Variable Products in WooCommerce allows you to add variations to a single product such as color, size, price, images or any other specific feature your product might have. This includes setting up attributes, terms, and variations. In the following examples, I will be using t-shirts.
Attributes
Before creating your variable product, you will need to create the attributes. Go to Products > Attributes. You will get this screen. When you click on #2 to add terms, the next screenshot shows you what that will look like.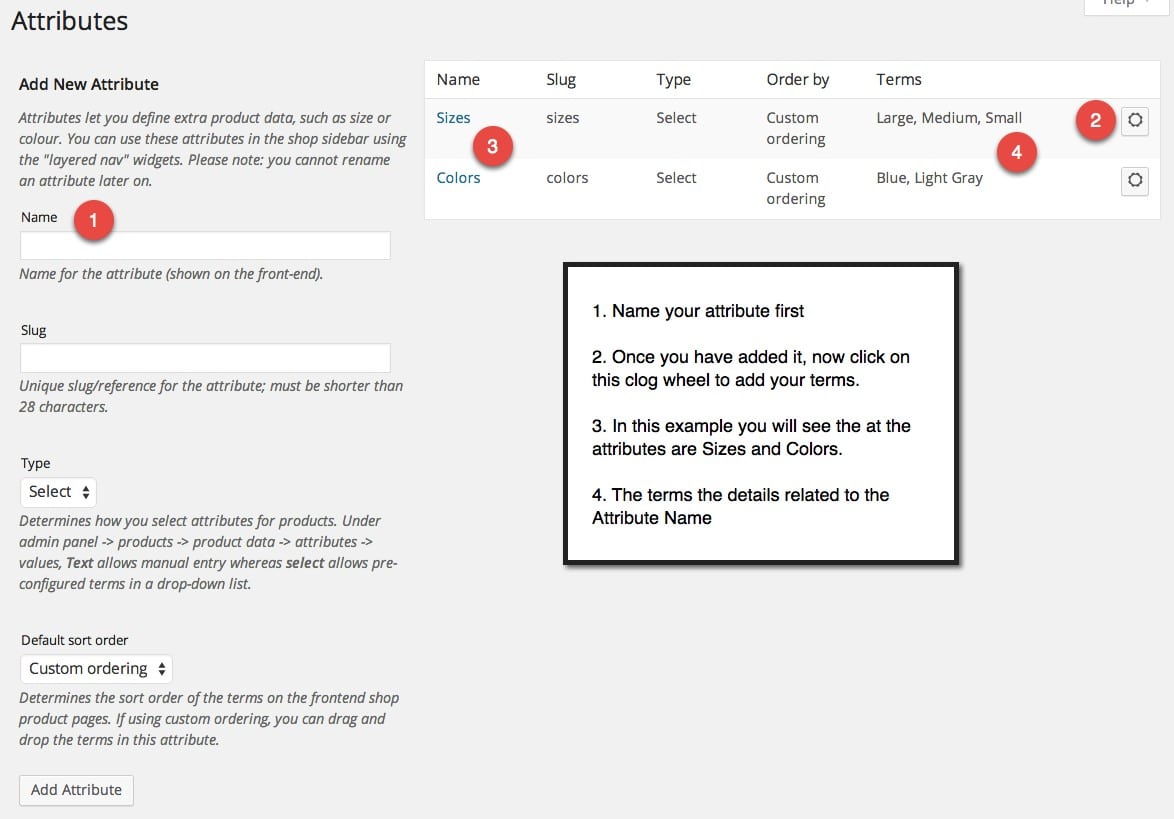
Attribute Terms
This is the page noted in step #2 of the previous screenshot.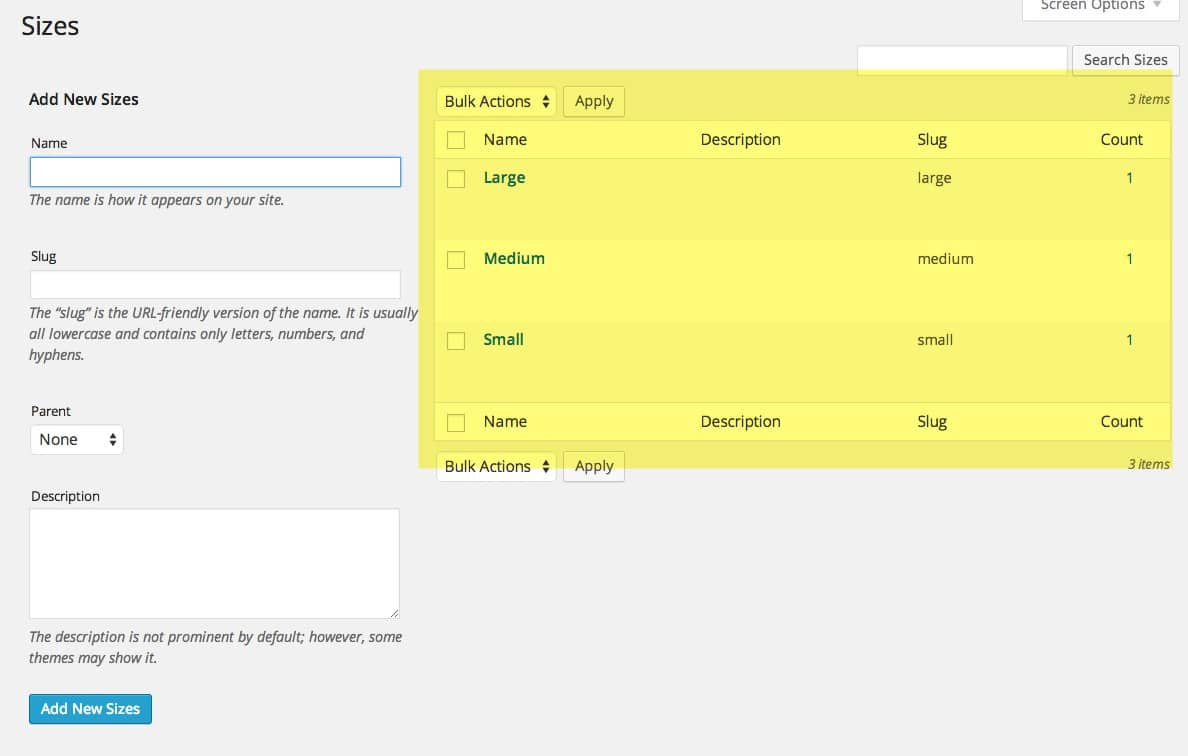
Creating the Variable Product
Now you will create your product. Under Products, click on Add New. Below your description, you will need to assign the product date to Variable Product.
You will of course fill in all the other necessary data and descriptions, but I am going to show you information specific to Variable Products.
Adding Attributes to Products
Here you will select the attribute or attributes that you want to add to the product.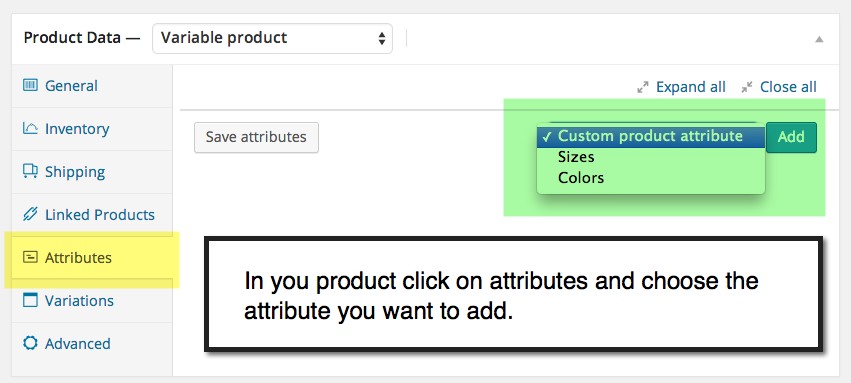
Now you will select what terms you want.
1. Make sure you have both Visible on the product page and Used for variations boxes ticked.
2. Add let’s you add only the terms you want for that specific product. In this example, maybe a specific t-shirt cannot be bought in small. There is where you could just add medium and large. Then Save attributes.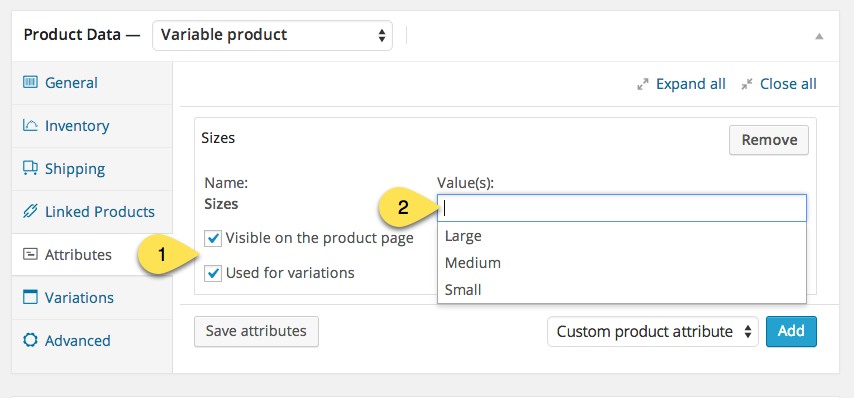
1. Or you can choose to Select All. This adds all the terms that were assigned to the specific Attribute.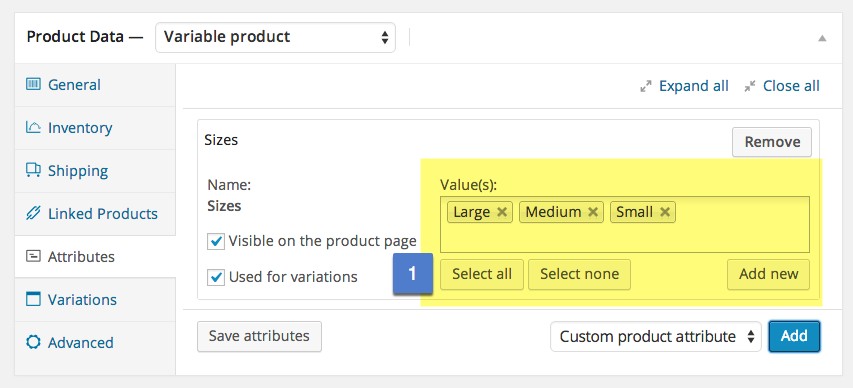
Then you can add additional Attributes and Terms to this specific product.
Variations
Now you need to add the variations.
1. When Variations are added, bulk edit can come in handy if you have a lot of variations. The drop-down menu gives you several options.
2. Here you can set the default Attribute that will show up in the drop-down menu on the product page.
3. Link all variations. This will automatically create every variation possible based on the Attributes and Terms. This is an easy way to get them all automatically added.
4. Add Variation. This is when you do not need every possible variation and want to add specific ones to the product.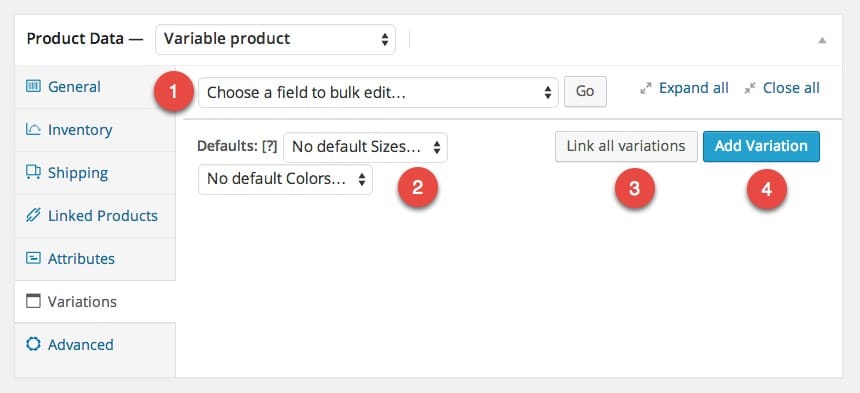
Setting up the Variations
This screenshot is a single variation and all of the settings that you can add just to that specific one. These are all pretty straight forward and some will be automatically filled in from settings that you have made elsewhere.
1. Note this small box. Click on this to add the specific image for that variation.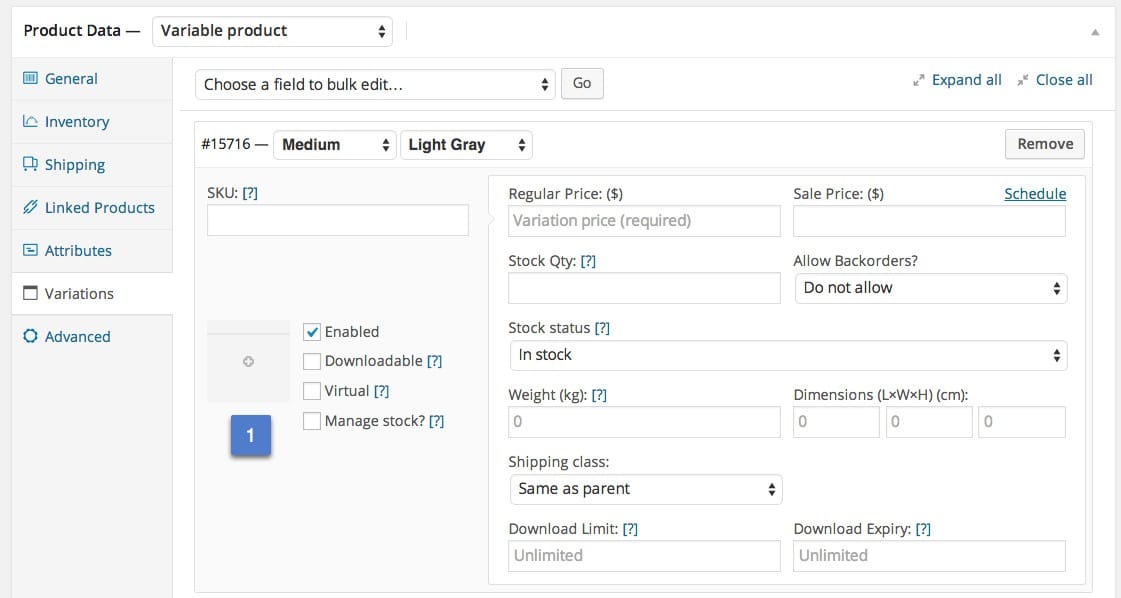
Once you have done that, you will now see that image there.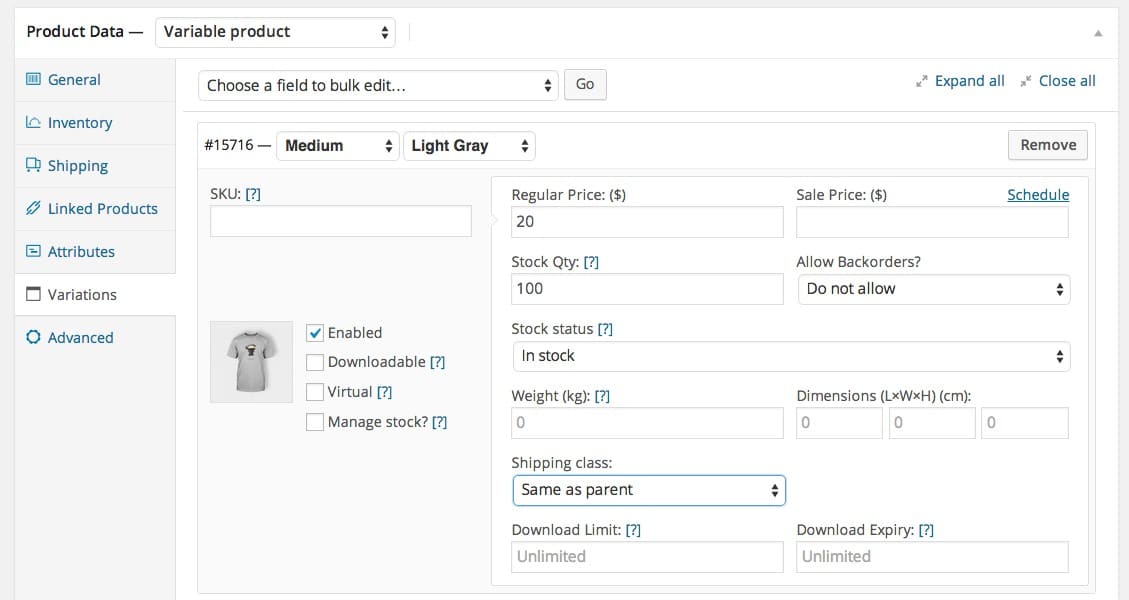
Once we publish this page, depending on your theme, this is what it will look like.
1. The pricing will now show the range of all variations.
2. A drop down menu of the attribute Sizes and its terms. Notice here that on the screenshot above on first creating variations, the fact that I kept the Sizes and Colors to default, the drop-downs will say Choose an option…
3. And the drop down for the Attribute Colors.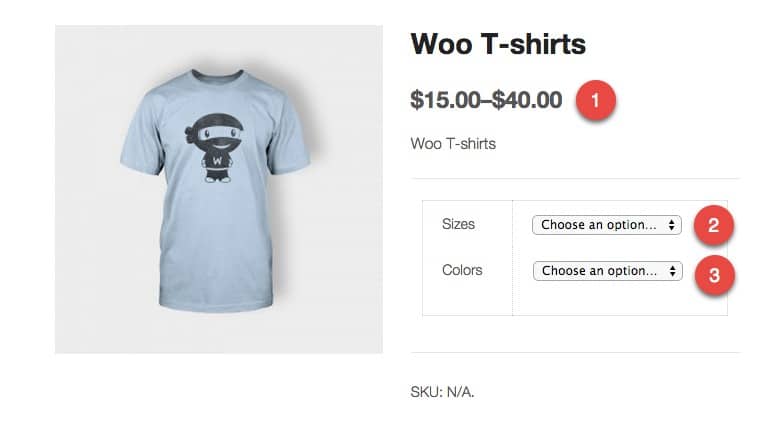
You will see that if I do
choose Light Gray in the colors, the image changes.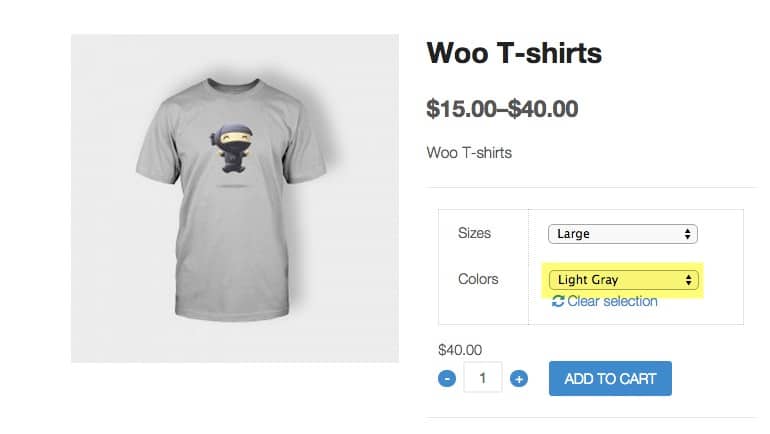
With this extension you can replace drop down fields on your variable products using color and image swatches. This is an excellent way to display the available colors of a product, their available styles and anything else you can think of that would display either an image or a color. Check it out here.